Larapinta Trail - Introduction - A photographer's hike!
Last year, April 2020, I had planned to hike the Larapinta Trail when COVID-19 hit Australia and the whole country went in to lockdown. I had already left Darwin for Alice Springs, and was in Uluru Kata Tjuta National Park when the chaos fully hit. I was a few days out from my hike start date and was told the trail (and all national parks in Australia), were closed. People were being told to go home and stay home. So, I left Uluru and drove straight home to Darwin in one day. (That’s a long drive! I left Uluru at 5am and ended up arriving home at 1am).
Anyway, long story short, I managed to make the hike happen the following year. My new start date was March 25th 2021. And I am SO glad I was forced to hike this year instead. Central Australia has had a bumper few months of rain (in terms of desert rain!). The Red Centre is now the Green Centre!
The evidence of the devastating bushfires of 2019 is still there, but regeneration is now well and truly under way. Waterholes were full, there were even mini waterfalls!
For photography, the conditions on the trail this season, were perfect!
A b o u t H I K I N G a n d P H O T O G R A P H Y
Hiking as a landscape photographer is sometimes done a little bit differently to a normal hiker.
There’s the obvious pack weight considerations - I carry around 5kg of camera equipment which means the rest of my equipment is both “no frills” and ultra-light where I can.
My schedule is also a little different to the average hiker - taking photographs takes time, so I always need to allow extra time. I also always carry extra food, so that if I decide to stay and photograph a location which pushes the schedule out even longer, I don’t have to sacrifice the shot because I don’t have enough supplies.
I also always want to ensure I am at a picturesque location for those hours of golden light at sunrise and sunset. This means camping at the locations best for photography! This is obviously an amazing experience, but in the case of hiking the whole Larapinta trail it meant lots of extra water carries as I was camped away from amenities most nights.
Camping in the location of your shoot also means making sure you don’t pitch your tent in the middle of a potential image! This is easier said than done if you’re in a group of people.
I didn’t really realise how rare it is to come across a hiker (or photographer!) who does both activities simultaniously! I didn’t think it was that rare to encounter someone passionate and committed to the two hobbies. It seems they go hand in hand (aside from the weight and gear problem!). Everyone I encountered on the trail and since talking about the trail, is completely astounded that one would do such a thing, but for me it’s a no-brainer. I love what I do! If I am going to hike, the camera is coming with me, no matter what!
If you’re a long distance hiker and are crazy enough to carry the DSLR (or mirrorless, or whatever else….), then please say g’day in the comments! I am SURE there must be many of us!
M Y H I K E S T A T S
At a glance….
Kilometres hiked = 231km
Days scheduled = 20
Days actual = 16
Nights camped at a trail shelter = 4
Water carries = 6 (i.e. when I knew there was going to be no water available at camp, I’d have to carry additional water to get me through the night and part of the next day).
So, I guess the first question to answer, is what camera equipment did I carry?
C A M E R A E Q U I P M E N T
Canon 5DSr body = 900g
Canon 16-35mm f/4 lens = 620g
Canon LP-E6N batteries = 150g each, I carried a max of 4 at one time
Sirui W-2204 carbon fibre tripod plus head = 2.2kg
Lee filter holder system and polariser = 100g approx
Sony RX100 VI camera and 2 batteries = 380g
So, a total weight of around 4.8kg.
The other question is that of power and keeping everything charged.
P O W E R A N D C H A R G I N G
The Larapinta Trail is very well equipped - each section trailhead has a shelter, water tank, toilets and many now have USB charging ports too! I had heard mixed reviews about their reliability, so I actually did not account for these in my planning. They were an added bonus if they were functioning (and they all were, as of April 2021).
The trail also has several locations that can be used for food drops, so you don’t have to carry food for the entire hike (which would be impossible for me at a 20 day schedule!). I used 3 food drop locations and company Larapinta Trail Trek Support (LTTS) dropped off my boxes of goodies to these locations so I could pick them up on my way through. I also included additional charged batteries and power banks in these boxes to assist with my requirements. All together I had 7 fully charged batteries and 2 power banks. Here’s how it went down…!
Departure from Alice Springs, 4 days until my first box at Standley Chasm. I had 3 fully charged Canon batteries and 1 small (5000mAh power bank). I used 1 full battery and did not use the power bank. I surrendered the 1 x flat battery and power bank at my first box.
Pick up at Standley Chasm for an 8 day stretch until my next box. I picked up 2 fully charged battery, and a fully charged 20,000mAh power bank. I used the USB charge points multiple times, but did not use the power bank.
At Serpentine Gorge, I surrendered another flat battery and picked up another fully charged (back with 4 fully charged batteries). 4 day section planned.
Ormiston Gorge, pick up one more fully charged battery and surrendered a flat battery.
If the USB charge points had ALL have been non-operational, I think I would have been OK still with just the 20,000mAh power bank. I was charging 2 cameras, phone and GPS mainly. My head torch had a couple of top ups too.
Regarding the Canon charger - there is no genuine Canon USB charger for the battery alone. You can get a cable that will charge the battery in the camera (I believe), but I purchased and used this one.
O V E R V I E W o f M Y T R A I L E X P E R I E N C E
(including common questions!)
My general routine was:
Get up around 5am, pack up the camp and start coffee/breakfast.
Do a lot of swearing and flapping about mosquitoes
Pre-dawn and sunrise photography shoot from 6am - 7am ish
Finish coffee/breakfast and leave camp around 7:30am
Hiking time! My earliest day finished around 10:30am (ha!). My longest day was finishing around 5:30-6pm.
I generally prefer to have an early dinner - around 5pm. This is because photography time is at sunset!
Sunset/afternoon photography 5:30pm to after sunset (7:15pm ish)
Dive in to the tent as soon as it’s dark to avoid the mosquito plaques!
Usually asleep by 8 - 8:30pm hahaha
Generally speaking, I found the trail itself easy. The hiking and the terrain was easy, as there was a defined trail. In saying that, 95% of my multi day hiking experience has been off track bush-bashing in the Top End. So, I think any marked trail in comparison to this would have seemed easy. I also hike regularly. I pretty much hike/camp overnight at least every 6-8 weeks or so.
The ground was mostly compacted gravel/rock with a bit of sand thrown in to give those calf muscles an additional workout! Again, I found this easy - I am used to hiking in the NT where 95% of terrain is rock. However, there were definitely more hills than I was used to!
I think it is important to note, that everyone is different. Everyone’s experiences and capabilities are different. I am experienced at carrying my equipment, I am an experienced hiker. I know my limits in terms of distances/lengths of days, how much water I typically consume and what I need to eat.
I find uphill much easier than downhill. My calf muscles are strong and my knees are weak. Add in a 15-20kg backpack and I am quite unsteady going downhill. In saying that, I found the trail very well planned in terms of hills. The trail zig zags up and down most of the hills, keeping my descents much easier to traverse, and less steep than I had expected.
I did lose the trail a few times. The trail markers were much more spread out than I am used to in the Top End. However, after a few days I got used to this and learned the ways of the trail!
The grass was high in Section 1 after all the rain, and there had been so few people using the trail this early in the season, so it was difficult to see the trail at times.
I carried the NT Parks Larapinta Trail maps, which were great (highly recommend!), so I always knew where the trail was headed roughly, even if I did lose the trail I knew I would eventually find it again. I was also carrying a GPS which had the trail marked on it… I had to pull it out twice to check the location of the trail after I had veered off and couldn’t see any sign of it! (No one wants to walk up an unnecessary hill!). I also noticed the trail was quite poorly marked through the multiple creek crossings of Section 9. However, after speaking to the ranger at Ormiston Gorge they hadn’t done any maintenance on that section of the trail and were a few days out from checking and re-marking that section…. so it should all be a non-issue now!
I found the trail very well equipped generally. Everything was well maintained, clean and functioning. I was the first end to-end solo hiker for the season, and I was using the trail at a very quiet time of year, so I can’t speak for busier times (again, let me know in the comments if you have an experience to share!)
To me, the trail did not feel remote. I did not feel like I was in the middle of nowhere. Again, that’s based on my experiences in the Top End off track. On the Larapinta, I could get phone service in many places, I saw people (not many but a few!), you travel through main tourist spots accessible from the road…. you can see the road a lot…. I guess people coming from the city who only hike marked trails, would probably feel very remote. To me it felt quite “mainstream”. It didn’t take anything away from the experience (I didn’t see anyone until Day 8, and apart from the last 4 days I only shared camp once. For the last 4 days I caught up with two girls who were just in front of me the whole trip, and it was nice to have camp buddies after 2 weeks alone!).
What I didn’t do so well….
My pack was heavy! I eliminated a bit of gear at my first food box pick up. A trek towel, a jumper, a couple of camera filters and other random stuff that was unnecessary. Although, after the first couple of days, I was used to my pack and did not have any more discomfort. I was stressing about carrying extra water as the pack would be the heaviest I had ever carried… but, it was fine. Yes, it was heavy and I found I needed to stop and rest more often, but completely manageable and non-soul destroying!!
I prepped WAYYYY too much food. I left a lot in my food drop boxes that was just unnecessary.
(Thank God for the amazing trek support service from Larapinta Trail Trek Support! They collected my boxes for me and I retrieved them at the end with all my electronic equipment and extra food which I could probably have survived doing the whole trail back again, with the amount of supplies I left!).
The only thing I would have done differently is possibly pack some earphones so I could have listened to music/audio books from my phone. I often hike with a small book so that I can relax and read in downtimes in the afternoons. But due to weight, I couldn’t carry a book as well! Earbuds would have meant I could listen to audio books instead! I’d never even thought of this but I met some girls doing this - great idea!
O T H E R R A N D O M I N F O
I am quite a quick hiker. I’m also very goal orientated so I found I was challenging myself in terms of time and km (there are km markers on the trail, and my quickest km was walked in 8 minutes!). I don’t find hiking difficult. I find carrying my pack difficult. So I prefer to finish my days early in the afternoon so I can rest and take photos!
I completed the trail in 16 days, but could easily have done it quicker if it weren’t for the photography and “waiting for the light”.
I have a dehydrator for preparing my own meals. It kept everything light, with minimal waste and maximum energy and nutrients. I’m not going to go through recipes, but here’s a couple of websites I found very helpful in creating successful meals! I made my own porridge and dehydrated fruit as well (instead of store bought sachets, as it meant I could add more sustenance like extra seeds and nuts). Lunch typically consisted of tuna and wraps (or crackers), but there were some other “convenience” style foods too like sachets of rice and beans.
Fresh off the Grid, and one of my fave recipes - sweet potato stew!
My boots were fabulous. I wore well “worn-in” boots, but not too old they’ll fall apart, are essential. Mine are definitely looking worse for wear now.
Gear repair equipment is ESSENTIAL. I think I had to repair every bit of important equipment on the trail?! I carry cable ties, cloth tape, “tear-aid” patches. And that seems to have fixed all my problems? I had a tear in my tent fly (repaired with “tear-aid”. I had crows grab hold of my packed up therm-a-rest mattress and rip two holes in it (another “tear aid” job). My bag chest strap tore from the webbing on the main straps (cable tie to re attach). I have previously cloth taped my old boots on a hike, but thankfully not required on this trip! My gaiters also broke in 3/4 different places, but I managed to keep going with them.
You can never have too many band-aids!
My first aid kit consists mainly of bandaids, antiseptic wipes, a bandage, pain killers and a few saline solution packets (I wear contact lenses so sometimes these are essential for trying to de-dust contact lenses!)
I have never used sea-to-summit wilderness wash before this trip, but it was a god send. Mainly for washing my hands before putting contact lenses in and out. It doesn’t need much water at all, but does a great job of getting dirt off. Usually in the Top End dry season I have such scratchy, crappy eyes from dirt and grit in contact lenses, and was expecting worse in the dry, sandy desert, but this wilderness wash was a great addition to the kit. (Can also be used as dishwashing liquid, clothes wash, body wash…. hellooooo clean socks, what a luxury!)
Prepare for the low points. Being a regular hiker, I know there are always times where you feel like you’ve had enough! I had 3 low points, but nothing too bad. Each one lasted probably less than an hour. With the exception of day 1, which was several hours for me! I was definitely heat exhausted on that day. It’s important to recognise the signs of heat exhaustion out here… My other low point was mid day on the top of Razorback Ridge, hot and hangry! The third was at the end of a 26km day which ended with a massive hill climb and carrying 7l of water. That was just general exhaustion!
On my first 2-3 days Alice Springs temperatures reached 35 degrees. Up on the rock, the temperature is easily 2-3 degrees hotter and obviously much more exposed. I used hydralite for the end of the day, but I also carry vegemite to snack on which is great for replacing salts!
O T H E R C O M M O N Q U E S T I O N S
Yes, I was solo. No I am not scared!
Yes, I loved it! ALL of it!
No, it is not dangerous - I am prepared with everything i need. (This included a satellite communication device with SMS capability and an EPIRB).
W H O W A N T S T O S E E S O M E P H O T O G R A P H Y ? !
It is going to take so long to go through all the photos! However, I am wanting to do a 2022 “Larapinta and West MacDonnell Ranges” wall calendar so I had to get 12 “hero” shots finished! (This will accompany my normal Darwin and the Top End Calendar I’ve been doing for nearly 10 years!)
So, here are those 12 shots I’ve edited. Some of these were taken on my explorations by car (and helicopter!), after the hike.
You’ll have to standby for the photos and stories from the rest of the hike. I am aiming to do a blog post of the adventure day by day…… (I have videos, notes from each day, and of course lots of shots!).
S c r o l l d o w n f o r a P H O T O G R A P H I C O V E R V I E W o f t h e L A R A P I N T A T R A I L
Or a photographic introduction…. should I say!?
There are many more shots to come!

An aerial shot of the Chewings Range, the early sections of the Larapinta Trail

Moonrise from the top of Pravda Spur - the high point along Section 3 - one of my personal highlights!

Standley Chasm
Sunrise looking out from Brinkley Bluff

Glen Helen Gorge at first light

Ellery Creek Big Hole - early morning reflections

Counts Point sunset - another one of my favourite camps, at the top of this ridge!

Hugh Gorge Waterhole

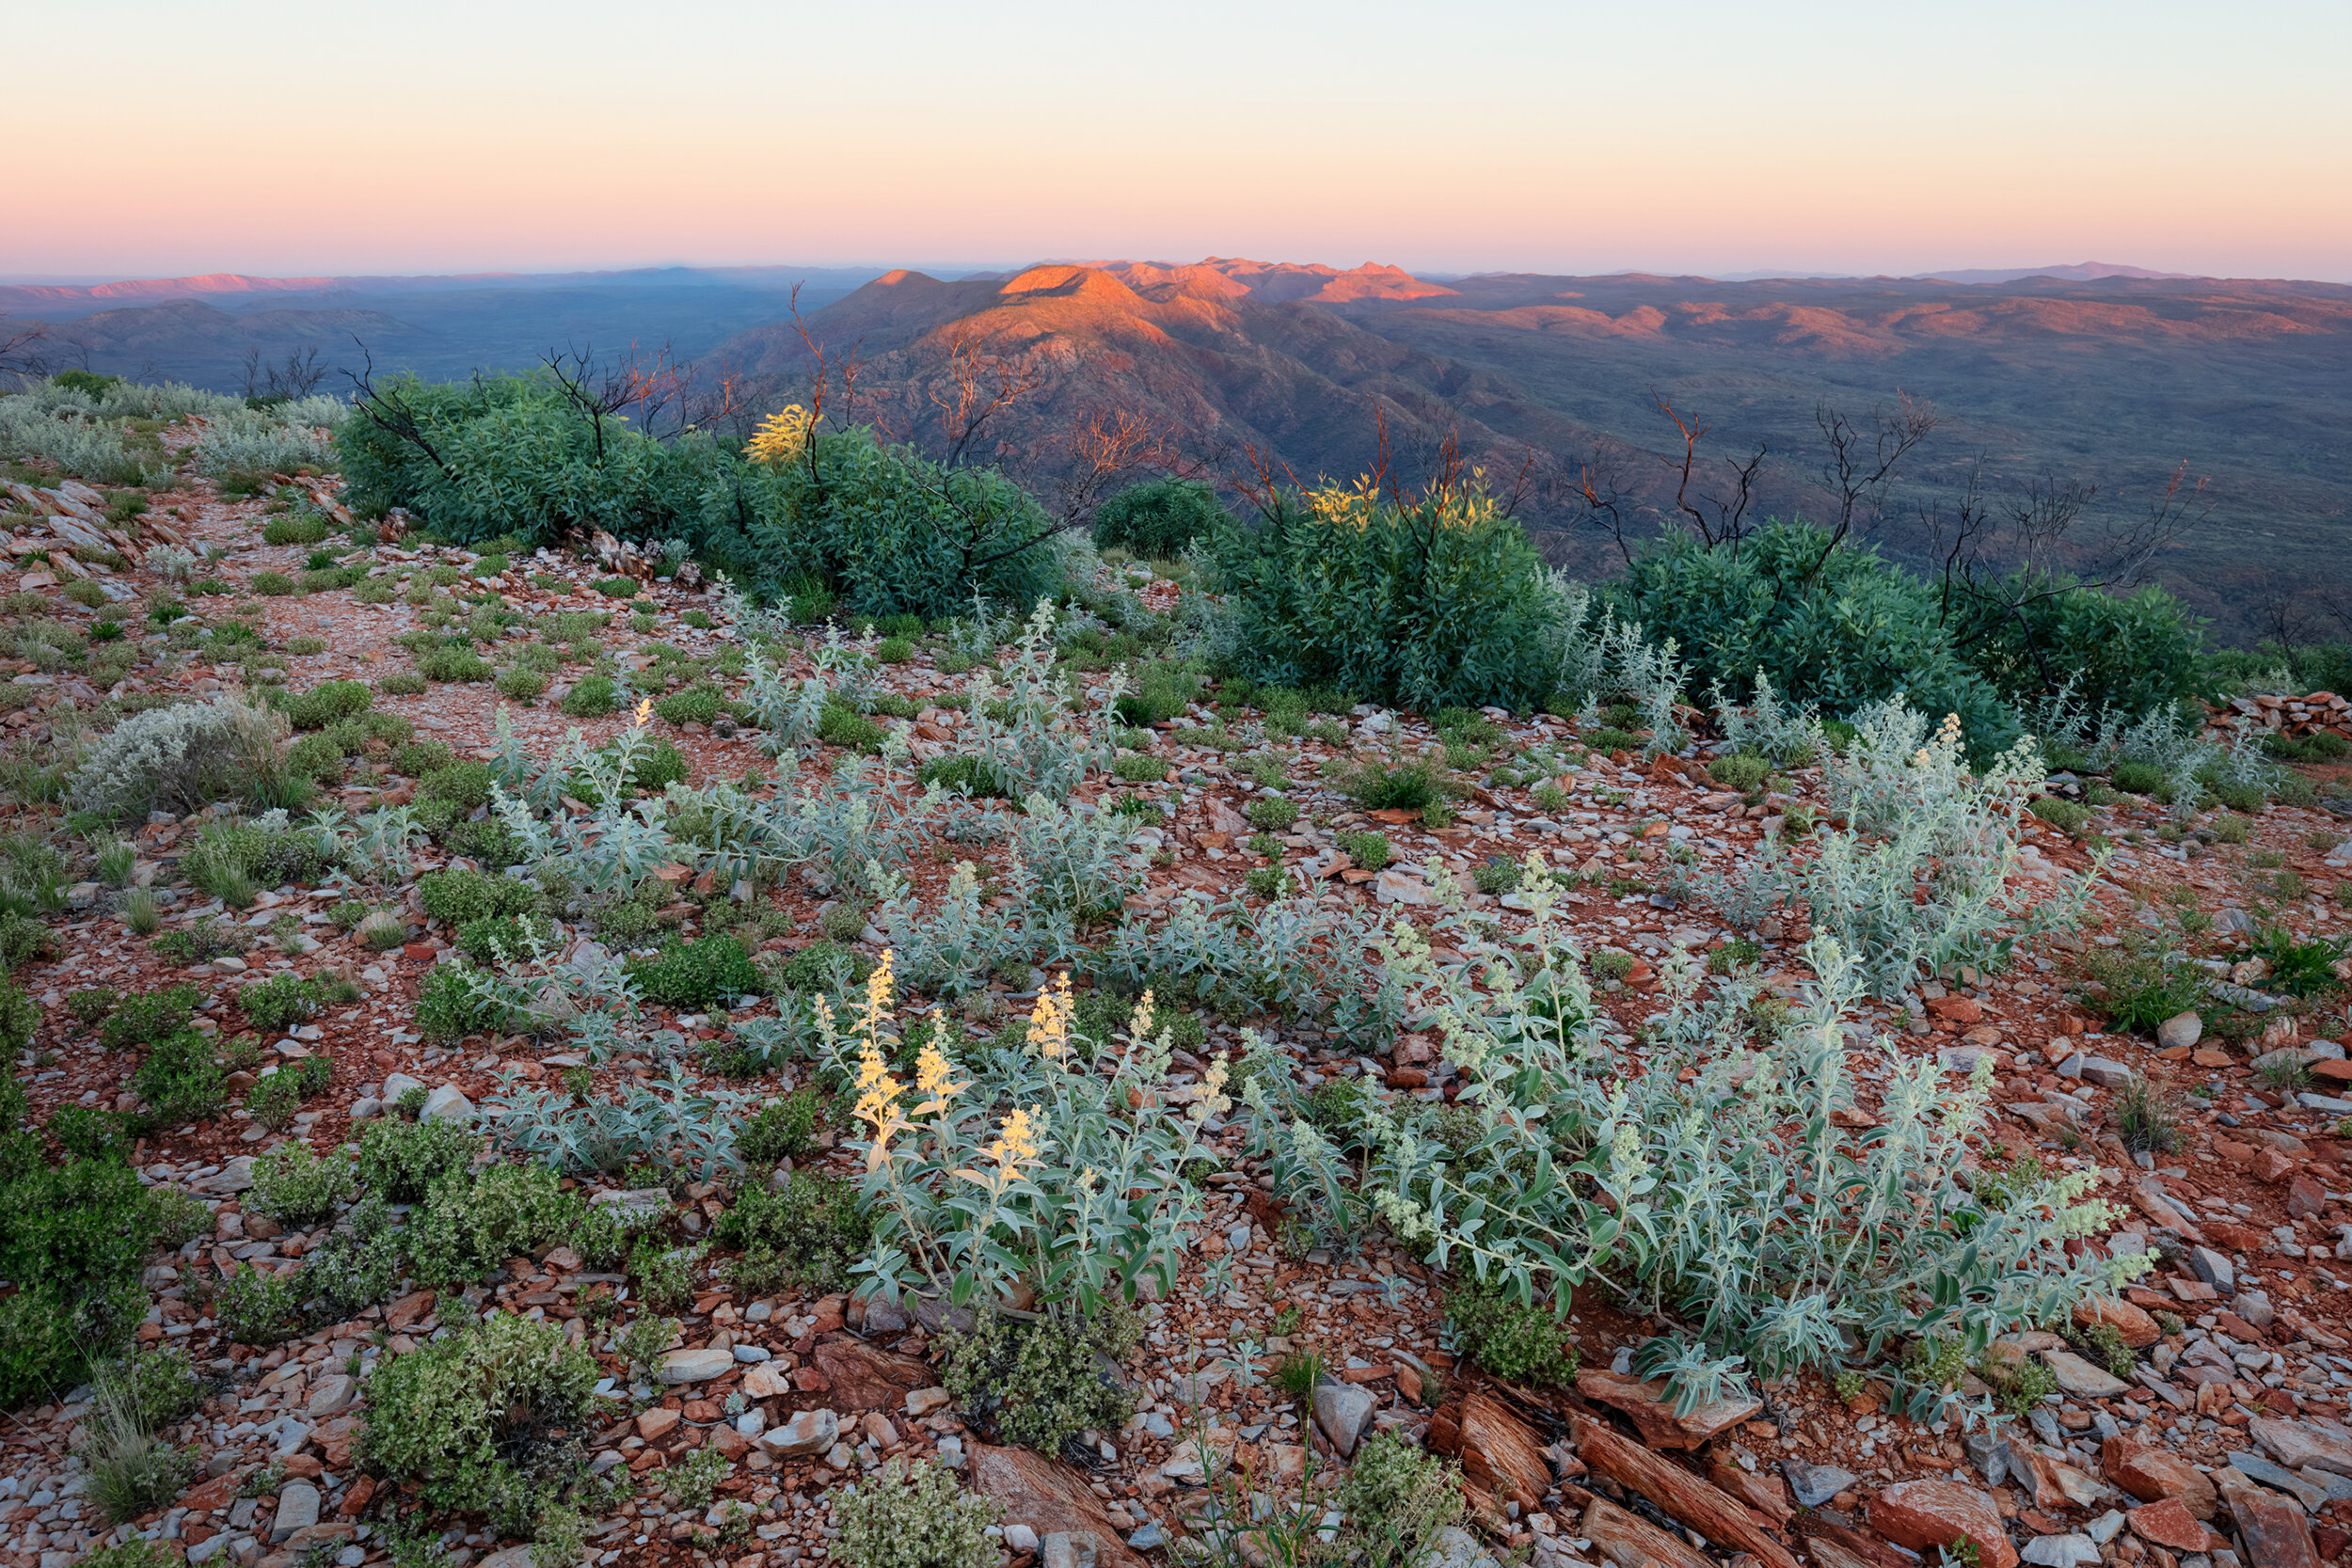
Sunrise from Mount Giles Lookout

Ormiston Gorge at last light, from Ghost Gum Lookout

Redbank Gorge

The end is in sight! Mount Sonder from Hilltop Lookout in Section 11 of the trail.
And for those who are interested in the 2022 calendar - pre orders will be open very soon (when they’re in stock this same link will still be valid, it just won’t say “pre-order” as they will be in stock and ready to ship!)